Tutorial#
This tutorial should give you a quick introduction to the MapProxy configuration.
You should have a working MapProxy installation, if you want to follow this tutorial.
Configuration format#
The configuration of MapProxy uses the YAML format. YAML is a superset of JSON. That means every valid JSON is also valid YAML. MapProxy uses no advanced features of YAML, so you could even use JSON. YAML uses a more readable and user-friendly syntax. We encourage you to use it.
If you are familiar with YAML you can skip to the next section.
The YAML configuration consist of comments, dictionaries, lists, strings, numbers and booleans.
Numbers#
Any numerical value like 12, -4, 0, and 3.1415.
Strings#
Any string within single or double quotes. You can omit the quotes if the string has no other meaning in YAML syntax. For example:
'foo'
foo
'43' # with quotes, otherwise it would be numeric
'[string, not a list]'
A string with spaces and punctuation.
Booleans#
True or false values:
yes
true
True
no
false
False
List#
A list is a collection of other valid objects. There are two formats. The condensed form uses square brackets:
[1, 2, 3]
[42, string, [another list with a string]]
The block form requires every list item on a separate line, starting with
- (dash and a blank):
- 1
- 2
- 3

- 42
- string
- [another list]
Dictionaries#
A dictionary maps keys to values. Values itself can be any valid object.
There are two formats. The condensed form uses braces:
{foo: 3, bar: baz}
The block form requires every key value pair on a separate line:
foo: 3
bar: baz
You can also nest dictionaries. Each nested dictionary needs to be indented by one or more whitespaces. Tabs are not permitted and all keys to the same dictionary need to be indented by the same amount of spaces.
baz:
  ham: 2
  spam:
    bam: True
  inside_baz: 'yepp'
Configuration Layout#
The MapProxy configuration is a dictionary, each key configures a different aspect of MapProxy. There are the following keys:
services: This is the place to activate and configure MapProxy’s serviceslike WMS and TMS.
layers: Configure the layers that MapProxy offers. Each layer can consistof multiple sources and caches.
sources:Define where MapProxy can retrieve new data.
caches:Here you can configure the internal caches.
grids: MapProxy aligns all cached images (tiles) to a grid. Here you can definethat grid.
globals: Here you can define some internals of MapProxy and default valuesthat are used in the other configuration directives.
The order of the directives is not important, so you can organize it your way.
Example Configuration#
Configuring a Service#
At first we need to configure at least one service. To enable a service, you have to include its name as a key in the services dictionary. For example:
services:
  tms:
Each service is a YAML dictionary, with the service type as the key. The dictionary can be empty, but you need to add the colon so that the configuration parser knows it’s a dictionary.
A service might accept more configuration options. The WMS service, for example, takes a dictionary with metadata. This data is used in the capabilities documents.
Here is an example with some contact information:
services:
  wms:
    md:
        title: MapProxy WMS Proxy
        abstract: This is the fantastic MapProxy.
        online_resource: http://mapproxy.org/
        contact:
            person: Your Name Here
            position: Technical Director
            organization:
            address: Fakestreet 123
            city: Somewhere
            postcode: 12345
            country: Germany
            phone: +49(0)000-000000-0
            fax: +49(0)000-000000-0
            email: email@example.org
        access_constraints:
            This service is intended for private and
            evaluation use only. The data is licensed
            as Creative Commons Attribution-Share Alike 2.0
            (http://creativecommons.org/licenses/by-sa/2.0/)
        fees: 'None'
access_constraints demonstrates how you can write a string over multiple lines, just indent every line the same way as the first. And remember, YAML does not accept tab characters, you must use space.
For this tutorial we add another service called demo. This is a demo service that lists all configured WMS and TMS layers. You can test each layer with a simple OpenLayers client. So our configuration file should look like:
services:
  demo:
  wms:
    [rest of WMS configuration]
Adding a Source#
Next you need to define the source of your data. Every source has a name and a type. Let’s add a WMS source:
sources:
  test_wms:
    type: wms
    req:
      url: http://example.org/service?
      layers: osm
In this example test_wms is the name of the source, you need this name later to reference it. Most sources take more parameters – some are optional, some are required. The type wms requires the req parameter that describes the WMS request. You need to define at least a URL and the layer names, but you can add more options like transparent or format.
Adding a Layer#
After defining a source we can use it to create a layer for the MapProxy WMS.
A layer requires a title, which will be used in the capabilities documents and a source. For this layer we want to use our test_wms data source:
layers:
  - name: cascaded_test
    title: Cascaded Test Layer
    sources: [test_wms]
Now we have setuped MapProxy as cascading WMS. That means MapProxy only redirect requests to the WMS defined in test_wms data source.
Starting the development server#
That’s it for the first configuration, you can now start MapProxy:
mapproxy-util serve-develop mapproxy.yaml
You can download the configuration.
When you type localhost:8080/demo/ in the URL of your webbrowser you should see a demo site like shown below.
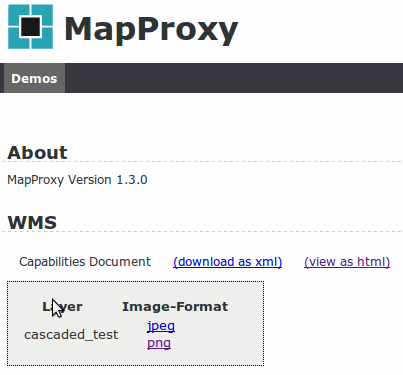
Here you can see the capabilities of your configured service and watch it in action.
Adding a Cache#
To speed up the source with MapProxy we create a cache for this source.
Each cache needs to know where it can get new data and how it should be cached. We define our test_wms as source for the cache. MapProxy splits images in small tiles and these tiles will be aligned to a grid. It also caches images in different resolutions, like an image pyramid. You can define this image pyramid in detail but we start with one of the default grid definitions of MapProxy. GLOBAL_GEODETIC defines a grid that covers the whole world. It uses EPSG:4326 as the spatial reference system and aligns with the default grid and resolutions that OpenLayers uses.
Our cache configuration should now look like:
caches:
  test_wms_cache:
    sources: [test_wms]
    grids: [GLOBAL_GEODETIC]
Adding a cached Layer#
We can now use our defined cache as source for a layer. When the layer is requested by a client, MapProxy looks in the cache for the requested data and only if it hasn’t cached the data yet, it requests the test_wms data source.
The layer configuration should now look like:
layers:
  - name: test_wms_cache
    title: Cached Test Layer
    sources: [test_wms_cache]
You can download the configuration.
Defining Resolutions#
By default MapProxy caches traditional power-of-two image pyramids with a default number of cached resolutions of 20. The resolutions between each pyramid level doubles. If you want to change this, you can do so by defining your own grid. Fortunately MapProxy grids provide the ability to inherit from an other grid. We let our grid inherit from the previously used GLOBAL_GEODETIC grid and add five fixed resolutions to it.
The grid configuration should look like:
grids:
  res_grid:
    base: GLOBAL_GEODETIC
    res: [1, 0.5, 0.25, 0.125, 0.0625]
As you see, we used base to inherit from GLOBAL_GEODETIC and res to define our preferred resolutions. The resolutions are always in the unit of the SRS, in this case in degree per pixel. You can use the MapProxy scales util to convert between scales and resolutions.
Instead of defining fixed resolutions, we can also define a factor that is used to calculate the resolutions. The default value of this factor is 2, but you can set it to each value you want. Just change res with res_factor and add your preferred factor after it.
A magical value of res_factor is sqrt2, the square root of two. It doubles the number of cached resolutions, so you have 40 instead of 20 available resolutions. Every second resolution is identical to the power-of-two resolutions, so you can use this layer not only in classic WMS clients with free zooming, but also in tile-based clients like OpenLayers which only request in these resolutions. Look at the configuration examples for vector data for more information.
Defining a Grid#
In the previous section we saw how to extend a grid to provide self defined resolutions, but sometimes GLOBAL_GEODETIC grid is not useful because it covers the whole world and we want only a part of it. So let’s see how to define our own grid.
For this example we define a grid for Germany. We need a spatial reference system (srs) that match the region of Germany and a bounding box (bbox) around Germany to limit the requestable aera. To make the specification of the bbox a little bit easier, we put the bbox_srs parameter to the grid configuration. So we can define the bbox in EPSG:4326.
The grids configuration is a dictionary and each grid configuration is identified by its name. We call our grid germany and its configuration should look like:
grids:
  germany:
    srs: 'EPSG:25832'
    bbox: [6, 47.3, 15.1, 55]
    bbox_srs: 'EPSG:4326'
We have to replace GLOBAL_GEODETIC in the cache configuration with our germany grid. After that MapProxy caches all data in UTM32.
MapProxy request the source in the projection of the grid. You can configure the supported SRS for each WMS source and MapProxy takes care of any transformations if the srs of our grid is different from the data source.
You can download the configuration.
Merging Multiple Layers#
If you have two WMS and want to offer a single layer with data from both server, you can combine these in one cache. MapProxy will combine the images before it stores the tiles on disk. The sources should be defined from bottom to top and all sources except the bottom need to be transparent.
The code below is an example for configure MapProxy to combine two WMS in one cache and one layer:
services:
  wms:
  demo:

sources:
  test_wms:
    type: wms
    req:
      url: http://example.org/service?
      layers: osm
  roads_wms:
    type: wms
    req:
      url: http://example.org/service?
      layers: osm_roads
      transparent: true

caches:
  combined_cache:
    sources: [test_wms, roads_wms]
    grids: [GLOBAL_GEODETIC]

layers:
  - name: cached_test_wms_with_roads
    title: Cached Test WMS with Roads
    sources: [combined_cache]
You can download the configuration.
Coverages#
Sometimes you don’t want to provide the full data of a WMS in a layer. With MapProxy you can define areas where data is available or where data you are interested in is. MapProxy provides three ways to restrict the area of available data: Bounding boxes, polygons and OGR datasource. To keep it simple, we only discuss bounding boxes. For more information about the other methods take a look at the coverages documentation. To restrict the area with a bounding box, we have to define it in the coverage option of the data source. The listing below restricts the requestable area to Germany:
sources:
  test_wms:
    type: wms
    req:
      url: http://example.org/service?
      layers: osm
    coverage:
      bbox: [5.5, 47.4, 15.2, 54.8]
      bbox_srs: 'EPSG:4326'
As you see notation of a coverage bounding box is similar to the notation in the grid option.
Meta Tiles and Meta Buffer#
When you have experience with WMS in tiled clients you should know the problem of labeling issues. MapProxy can help to resolve these issues with two methods called Meta Tiling and Meta Buffering.
There is a chapter on WMS labeling issues that discusses these options.
Seeding#
Configuration#
MapProxy creates all tiles on demand. That means, only tiles requested once are
cached. Fortunately MapProxy comes with a command line script for pre-generating
all required tiles called mapproxy-seed. It has its own configuration file called
seed.yaml and a couple of options. We now create a config file for mapproxy-seed.
As all MapProxy configuration files it’s notated in YAML. The mandatory option
is seeds. Here you can create multiple seeding tasks that define what should be seeded.
You can specify a list of caches for seeding with caches . The cache names
should match the names in your MapProxy configuration. If you have specified
multiple grids for one cache in your MapProxy configuration, you can select these
caches to seed. They must also comply with the caches in your MapProxy configuration.
Furthermore you can limit the levels that should be seeded. If you want to seed only
a limited area, you can use the coverages option.
In the example below, we configure mapproxy-seed to seed our previously created
cache test_wms_cache from level 6 to level 16. To show a different possibility to
define a coverage, we use a polygon file to determine the area we want to seed.
seeds:
  test_cache_seed:
    caches: [test_wms_cache]
    levels:
      from: 6
      to: 16
    coverages: [germany]

coverages:
  germany:
    polygons: ./GM.txt
    polygons_srs: EPSG:900913
As you see in the coverages section the polygons option point to a
text file. This text file contains polygons in Well-Known-Text (WKT) form. The third option tells
mapproxy-seed the srs of the WKT polygons.
You can download the configuration and the polygon file.
Start Seeding#
Now it’s time to start seeding. mapproxy-seed has a couple
of options. We have to use options -s to define our seed.yaml and -f
for our MapProxy configuration file. We also use the --dry-run option to see what
MapProxy would do, without making any actual requests to our sources. A mis-configured seeding
can take days or weeks, so you should keep an eye on the tile numbers the dry-run prints out.
Run mapproxy-seed like:
mapproxy-seed -f mapproxy.yaml -s seed.yaml --dry-run
If you sure, that seeding works right, remove --dry-run.
What’s next?#
You should read the configuration examples to get a few more ideas what MapProxy can do.
MapProxy has lots of small features that might be useful for your projects, so it is a good idea to read the other chapters of the documentation after that.
If you have any questions? We have a mailing list and IRC channel where you can get support.
Comments#
Everything after a hash character (
#) is a comment and will be ignored.